
Numbering on PageSeq
After installing PageSeq, you have the option to build a new numbering job from scratch or you may open a saved job or download one of the saved sample job templates.
In this sample we will demonstrate how to build a job from scratch. Start by double clicking on the desktop icon to open a blank template.
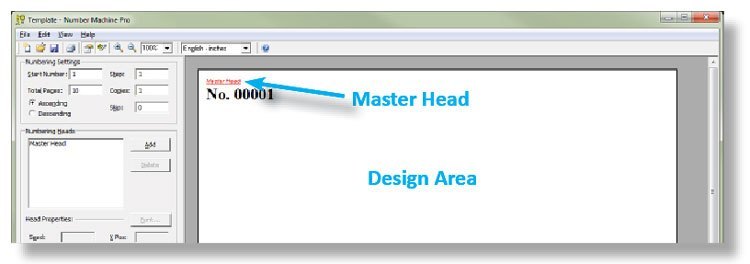
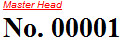
The design area will be blank except for the Master Head which will be set by default to No. 00001.
You could set up the numbering heads first, but I find it easier to import the PDF I want to number and place the number heads afterwards.
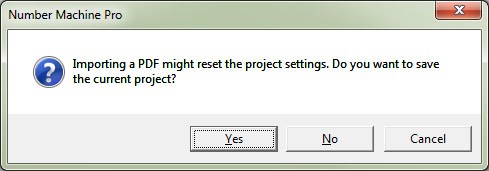
Go to File/Import PDF. You will be shown a warning message saying “Importing a PDF might reset the project settings. Do you want to save the current project?”
Make your selection and you will be brought to the Open dialogue box where you will select the PDF you wish to import.
Note: You can number without importing a PDF.
Importing a PDF
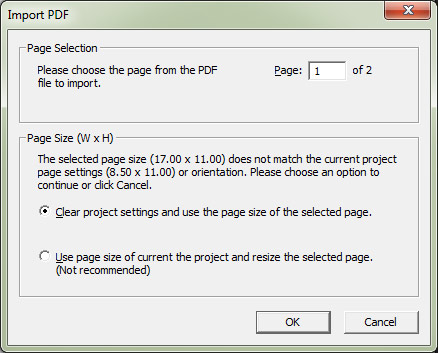
The Import PDF dialogue is where you will make some numbering job decisions based on the PDF you are importing.
PageSeq will only allow you to import one PDF at a time. Under Page Selection you have the option to choose which page you’d like to import if the PDF has more than one page. You can change the number by typing it in manually. This area will be grayed out if the PDF has only one page (recommended).
Page Size will tell you the width and height of the PDF you have selected and report it to you. In the sample case shown here the size of the PDF I am importing is 17 “ wide by 11” tall. I am given the choice to accept the size and reset my PageSeq job settings to match the PDF or to resize the PDF to the size of the job I’ve started. The blank template defaults to 8-1/2” x 11”. This setting is generally not recommended because in this case, it will shrink the PDF disproportionately and make the 17” dimension fit within the 8-1/2” and seriously distort the job.
It is recommended that you create the PDF to the final dimensions you wish the job to print to avoid these types of problems.
Note: You may only upload one PDF at a time. If you want to print different text on each sheet, such as with multi-part carbonless forms, you would need to print each separately and collate the sets afterwards.
Changing the numbering job size
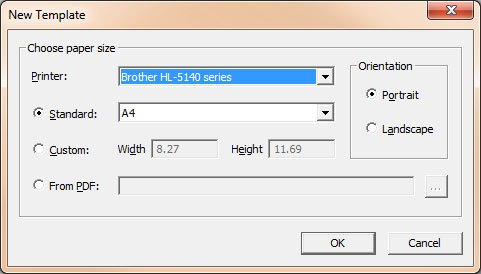
You may set the job size prior to importing a PDF. Just go to File/New and select a standard or custom paper size, or you can set the job to take its size readings from the PDF prior to importing.
You can also change the orientation here to Portrait or Landscape.
Note: NMP can print to any dimension your printer will allow.
Now is the time to make some critical decisions regarding your sequential numbering job. This section will show you how to set up your sequential numbering job by adjusting the start number, total pages, step, copies, skip and ascending or descending settings.
- Start Number: What number do you want to start on?
- Total Pages: How many of each form do you have on the single page: 1-up, 2-up, more?
- Step: Do you need to jump numbers, like #1 then next is #3?
- Copies: Do you need more than one copy of an identical number, such as with carbonless forms?
- Skip: Do you need to insert sheets with no printing?
- Ascending or Descending: Does your printer eject the paper face up or face down? What number do you want to be on the top of the stack when the job is finished, the first number or the last?
Note: Changes to the numbering settings are global. They affect all of the number heads.
Start Number
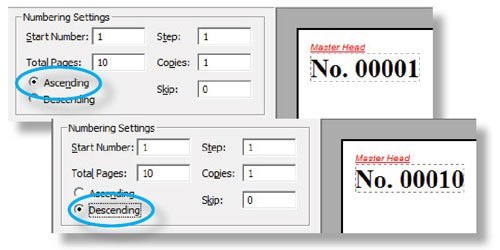
The Start Number allows you to choose what value to set the Master Head. The design area will show this value for the Master Head when the numbering direction is set to Ascending. If the numbering direction is set to Descending, you will not see the start value, but rather the ending value that is calculated for you.
Note: Start Number will always be the lowest number in the print run regardless of ascending or descending order.
Total Pages
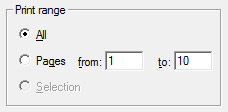
The Total Pages value will be determined by how many sheets of paper you will be running through your printer. This number will be divided by however many “up” you are running in the job:
1-up = Total Pages is the end number
2-up = Total Pages is the end number divided by 2
3-up = Total Pages is the end number divided by 3
4-up = Total Pages is the end number divided by 4
Note: The Total Pages value will match the Print/Print Range value.
Ascending and Descending
The Ascending and Descending buttons allow you to control the way the sequential numbers are printed out on the page.
If Ascending is selected, the Master Head number will increase from the Start Number to the Total Pages value.
If Descending is selected, the printed numbering sequence will decrease starting from the Total Pages value to the Start Number.
The design window will show the final calculated number in the sequence.
Step
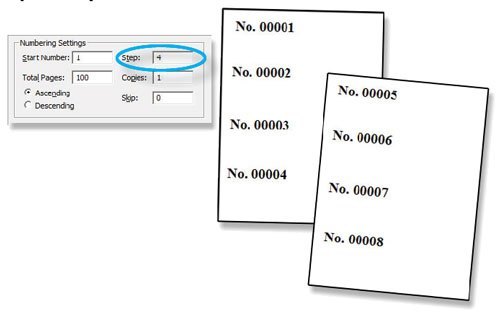
For every printed page each numbering head is incremented by the Step value. Step allows you to print consecutive numbers (1, 2, 3, 4) on the first page and start the sequential numbering where you left off on the next page (5, 6, 7, 8).
Copy
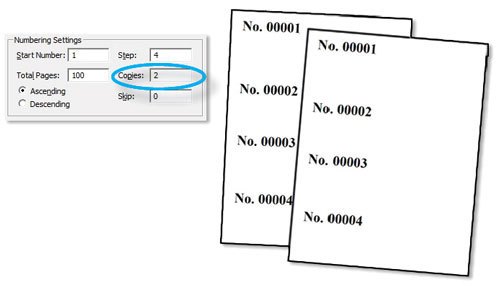
The Copy value can be used for multi-part forms or any time you want duplicate numbers on more than one page. If you enter a value of 2 you will get 2 pages with the same numbers repeated.
Skip

The Skip value will cause the program to print blank pages. Pages are skipped in succession, so if 1 is entered the first page will print the number heads and any PDF that is present while the next page will be totally blank and the 3rd page will print the next set of numbers. If you enter a value of 2, 2 pages will print and then 2 blank pages will come out.
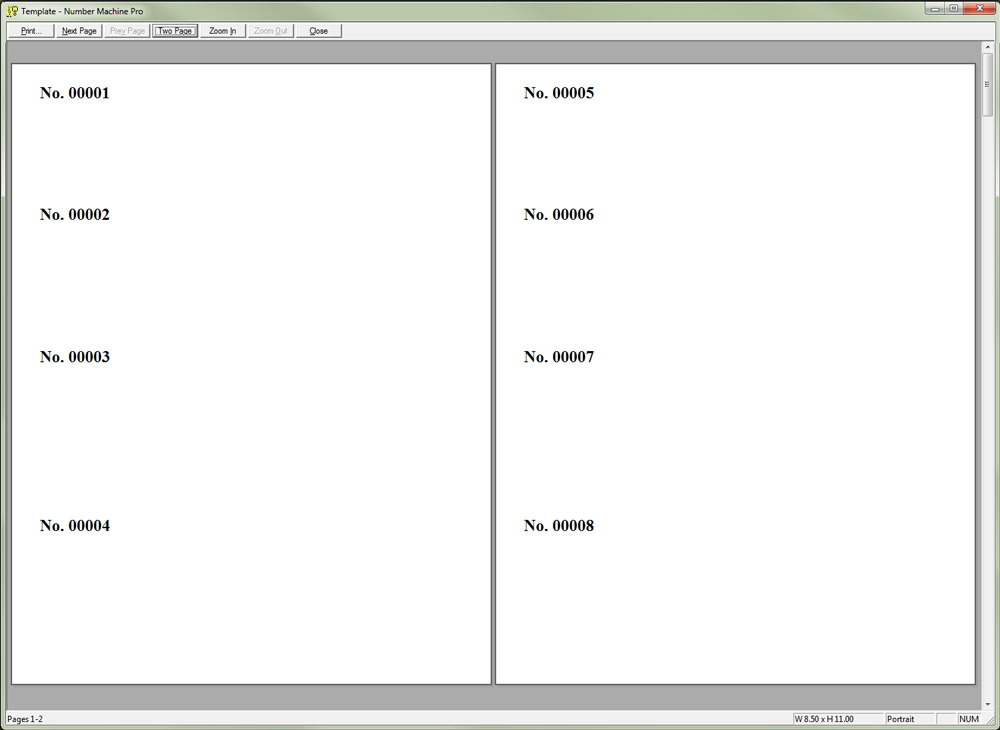
Print Preview
Use Print Preview in Two Page mode to inspect your numbering settings and make adjustments as needed.
Master Number Head Setup
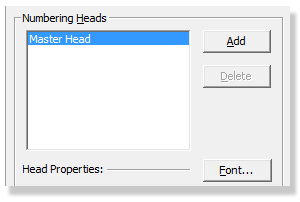
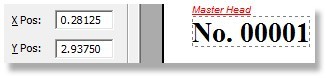
Each new job starts out with a single number head called the Master Head. It defaults to No. 00001 in Times New Roman Bold 16pt. black.
You may add up to 1,500 heads per page and change them each individually. To save time and promote consistency, you can also set all of the values of the Master Head and then copy and paste it to create as many identically formatted heads as your project requires.
Note: You may select all number heads at the same time with Ctrl+A or by holding down the Ctrl key and clicking on the heads you want to make global changes to.
Rotation
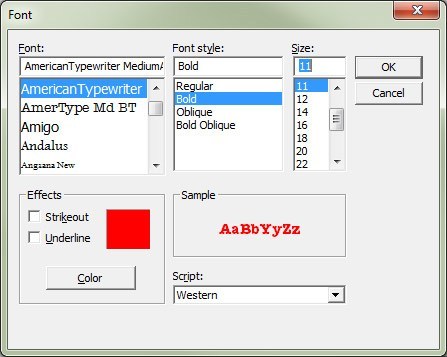
Next, choose the Rotation. You have the option to rotate the number heads 360 degrees individually or as a group.
Note: You can set each number head individually or copy and paste them so they are all the same style.
X Pos and Y Pos
X and Y positions are valuable in allowing you to position your number heads accurately in comparison to just using your eyes and mouse.
The X Pos is the distance from the left side of the page to the top left corner of the number head. The Y Pos is the vertical position from the top of the page. You can either drag and drop the Master Head to the desired position or type in a numeric value for greater precision.
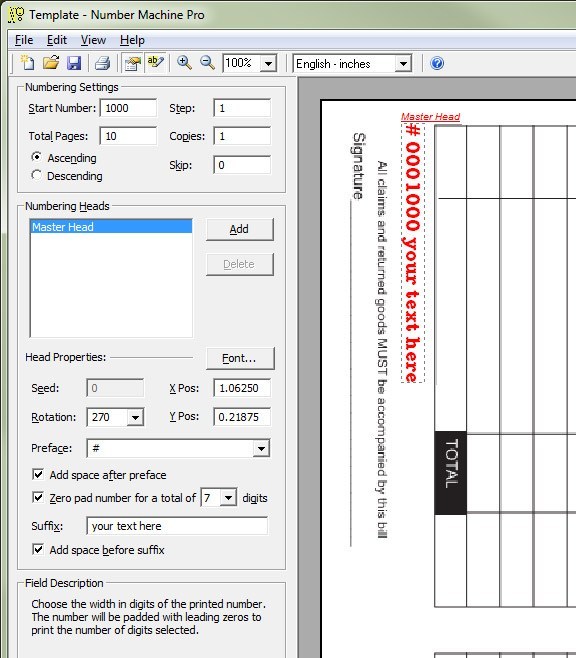
Preface and Suffix
Now, decide what characters or numerals, if any, you’d like to have before and after the changing number. The Preface defaults to No., but can be changed to anything you want. The Suffix comes after the numbers. You can turn these off if you would like.
Once set for each individual head, the Preface and Suffix are static and do not count up or down.
Note: The Preface and Suffix numbers/digits can be unique for each number head, but once set do not count up or down.
Zero Pad

The Zero Pad setting allows you to choose how many leading zeros you’d like. This is important if you will be numbering several hundred or thousand pages. If you uncheck the Zero Pad, the job will print however many digits are required. You can override that by entering any number up to 7 digits.
Add space

By checking the “Add space after preface” or “Add space before suffix” buttons you can elect to insert a blank space.

Field Description
This area provides a brief description of any highlighted field to help you understand its usage.
Seed
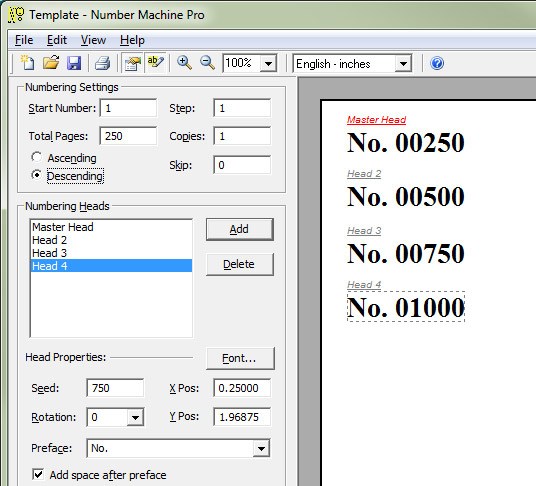
The Seed value is key to setting up your numbering jobs. The Seed Value adds to the Start Number of the Master Head and needs to be set individually for each additional head.
Note: The Master Head is based on the Start Number. You cannot edit the Seed value on that head.
Field Description
This area provides a brief description of any highlighted field to help you understand its usage.
Note: 9,999,999 is the highest number this program can print