Frequently Asked Questions
PageSeq can be used on Windows computers (10 or 7). We have had a few customers install this program on their Windows 8 machines but they needed to change settings to force their computer to behave as if it were an older operating system when using this program. You would need to consult Windows documentation to learn how to do this.
As always, we recommend you download and install the free PageSeq demo prior to purchase to ensure that it will work as expected with your system.
This program is not compatible with any Mac (Apple or iOS) computers.
The demo version is exactly the same as the full version except the words “Demo Version” will print above each number head as a watermark until the program has been purchased and registered.
PageSeq will print on any stock that your printer will feed including label stock. You would just set up the job to print as you normally would or import a PDF set up from an Avery template.
Yes. This program makes running multiple-part carbonless forms easy. Check out the Multi-part NCR sample template to see how to set up a carbonless form job.
PageSeq files are saved with a .NMT file extension but double clicking on your saved files doesn’t always cause PageSeq to start. We recommend you start the program first, then locate and open the file you would like to work from.
Opening a Recent PageSeq File:
- On the very top menu bar, click File. A drop-down menu will appear.
- Click Open.
- Locate the file you wish to open.
- Click the file name.
- Click the Open button or double-click the file.
The standard template, which opens automatically when you start the program, defaults to a 8.5” x 11” paper size. If your PDF is a different size, you need to make sure your settings match up. You can do this a couple of different ways:
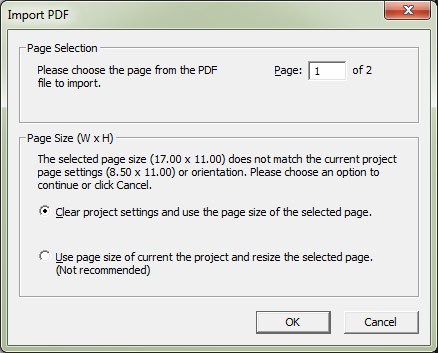
- Import PDF: If the PDF you choose to import is not the expected 8.5” x 11” size, a popup will appear asking you to select how you want to handle the file. You can either “Clear project settings and use the page size of the selected page” (recommended) or “Use page size of current project and resize the selected page” (not recommended). For the most consistent results, we highly recommend you design your PDF file to the proper page size when printed without scaling.
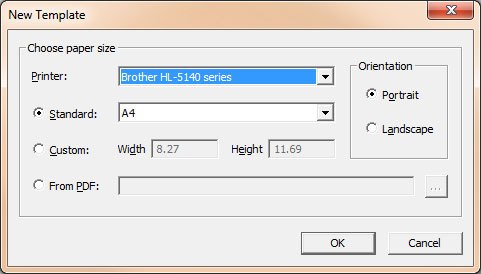
- New Template: You can also start a new template (Ctrl + N) and set the job up to any size you desire with or without importing a PDF. In the New Template window you can choose your printer and select your page size from one of the three choices: Standard: a pull-down menu of your printer’s common paper sizes appears. Custom: Only available if your printer allows for custom sizes, or from PDF: you can select a PDF and the job will be automatically set to the file’s dimensions.
PageSeq can be set up to print to any size paper that your printer can handle. You need to be familiar with your printer’s minimum margins, however, as most printers cannot print within a certain distance of the edge of the paper. If portions of your PDF get cut off, you might be printing outside of your printer’s allowable margins.
Printer margins vary by brand, but a standard safe border area is usually between 3/8” to 1/4″. Make sure to leave plenty of border margin space when you are setting up your PDF file, and print a test copy directly from your PDF to make sure your job fits within the maximum print area and is nicely centered before you import the PDF into PageSeq.
We do not recommend scaling an imported PDF as this could create unexpected results and poor margin performance.
If you’ve confirmed that your PDF is the correct size without scaling and that your page margins are within your printer’s tolerances, but you are still experiencing problems – such as the edge of the job being cut off, we suggest you print fewer-up per sheet and select a smaller page size.
Hot keys or quick keys are the keyboard combinations that can be used to easily perform a desired action. For example, if you want to quickly save your document, instead of going through the menu bar, or even the toolbar, you can just press Ctrl and S at the same time. This saves time, and makes performing actions even easier.
| Function | Key Combo |
|---|---|
| New | Ctrl+N |
| Open | Ctrl+O |
| Save | Ctrl+S |
| Ctrl+P | |
| Undo | Ctrl+Z |
| Add | Ctrl+D |
| Cut | Ctrl+X |
| Copy | Ctrl+C |
| Paste | Ctrl+P |
| Delete | Ctrl+Del |
| Select All | Ctrl+A |
| Set Zoom | Ctrl+L |
| Zoom In | Ctrl+Num+ (the + symbol) |
| Zoom Out | Ctrl+Num+ (the - symbol) |
Depending on the PDF file size, sometimes the file sent to the printer can be huge and will sometimes crash the print spooler. We recommend shutting off your print spooler and printing directly to the printer when using PageSeq.
The skip value will cause the program to literally “skip” pages – print blank pages. Pages are skipped in succession, so if 2 is entered for the Skip value, the program will print a numbered page and then print 2 blank pages.
Yes. You can change the prefix to anything you wish.
You can also turn off the feature and have no prefix at all. The prefix will remain the same on a single numbering head throughout the numbering run. You can have a different prefix on each number head.
You may also add a suffix to the end of a number if you desire.
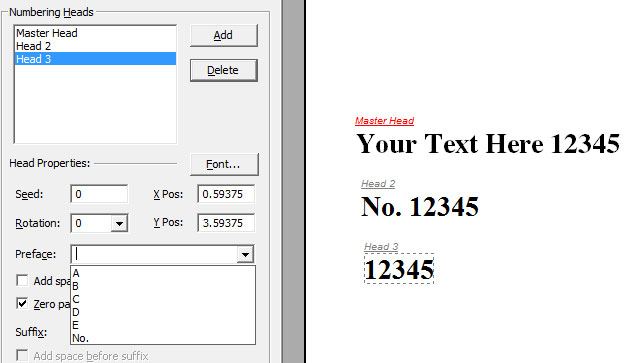
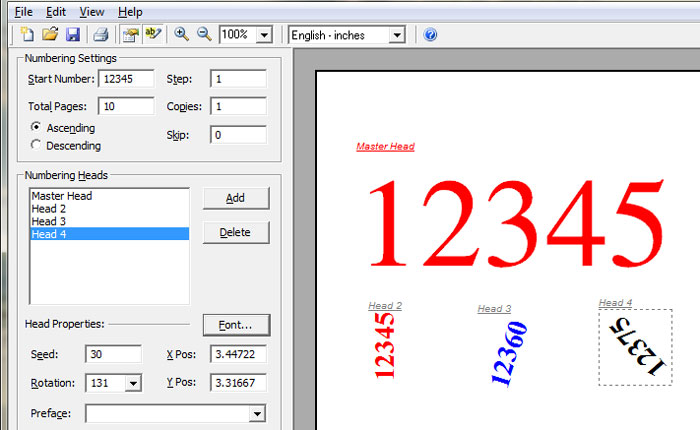
Click and drag with the mouse to change the head placement or select the numbering head you wish to move and type in X and Y coordinates.
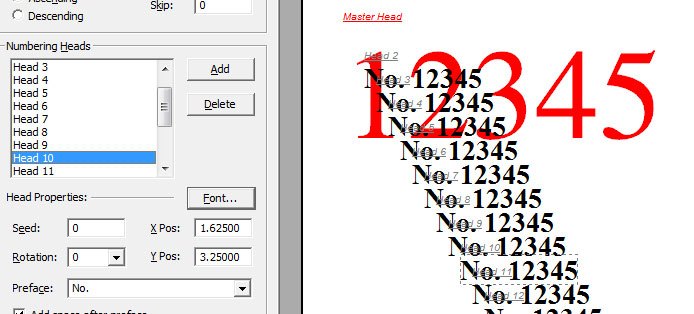
You can place up to 1,500 numbering heads anywhere on the page.
Yes, you can place as many numbering heads as you wish on a single job and each can be set to a different angle using the rotation feature. Just select the numbering head you wish to angle, select a rotation from the pull down menu or type in any number manually. If you don’t like how a numbering head is rotated, just select that head and change the rotation setting back to horizontal.
Yes, Numbering Heads can be set to include alpha letters.
Examples: RH23K45, RH23K46, RH23K47
In the case above you would set the prefix to “RH23K” and then follow with the numbering. You can also set the suffix as alpha letters. The numbering heads cannot be set to increase/decrease the alpha letters.
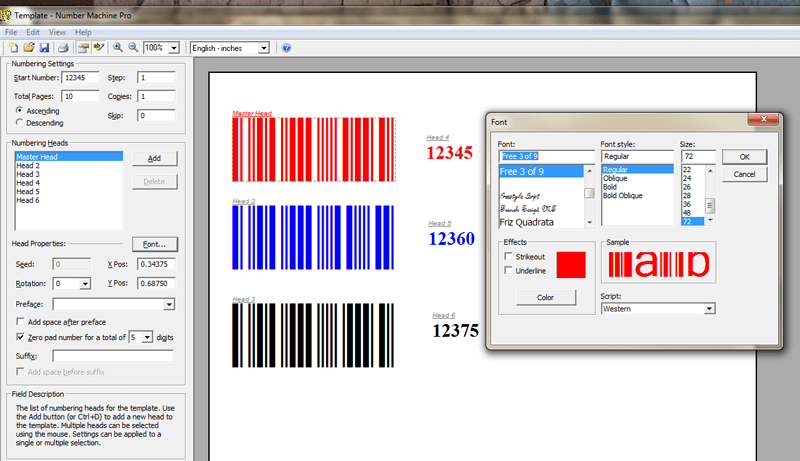
Yes, PageSeq will let you print a barcode.
Barcode fonts are not included, but will work with PageSeq. Barcode fonts are available from 3rd party vendors. Just install the barcode font in your system’s Control Panel/Fonts and then choose the numbering head you want to make into a barcode.
The fastest way to learn how to operate PageSeq is to download one of the sample job templates that most closely represents the type of numbering you are trying to set up.
Unzip the files and open the .NMT file using PageSeq. All of the settings will already be in place, all you need to do is replace the PDF with your own, change the settings to match your required numbering parameters and go to Print Preview to make certain it set up correctly so you don’t waste any paper.
When you save your document, PageSeq saves your files as PageSeq Templates (.PST).
For importing images, PageSeq allows you to import single page .PDFs.
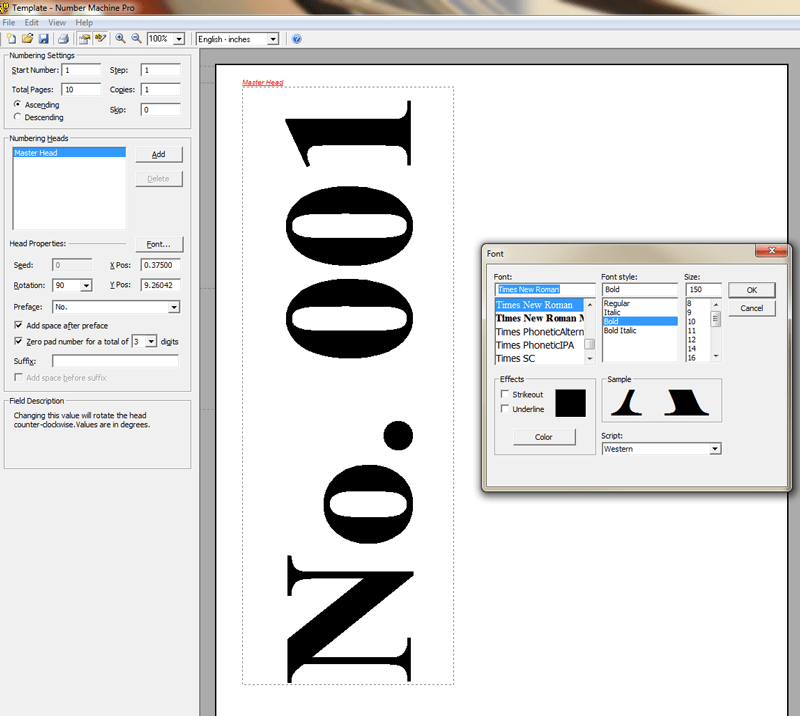
Any size. PageSeq uses your Windows’ system fonts and font controls to handle the text of your numbers.
You can make the number as large as your page size and printer will allow. You can use the Font control’s slider to change font size or you can simply type any number under Size and then click OK.